


As part of my kids clothing week challenge, I once again used the basic kid pants pattern from MADE and added my own flair. (she should be paying me for all my advertising!) I have made her pattern with pants, shorts, pjs, overalls and with pockets on outside…however I wanted to try and put pockets inside, and I love the result.

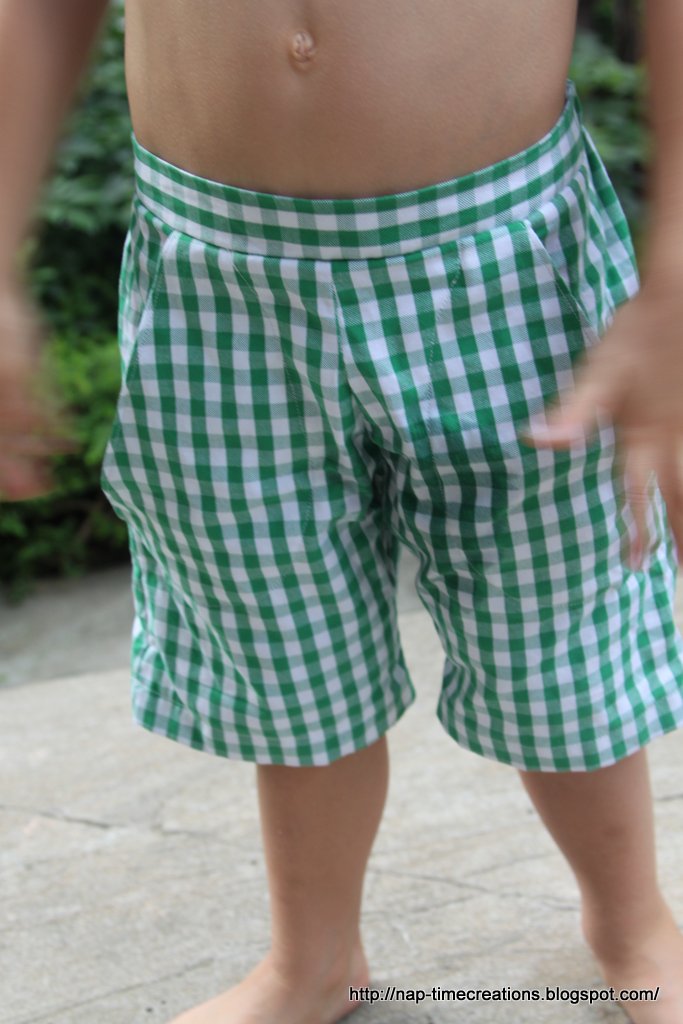

They do look better on the older one…the chubby baby belly isn’t as nice in the flat front pants, but they both look cute.
Want to make your own?
Start by printing your own Made Pant Pattern.
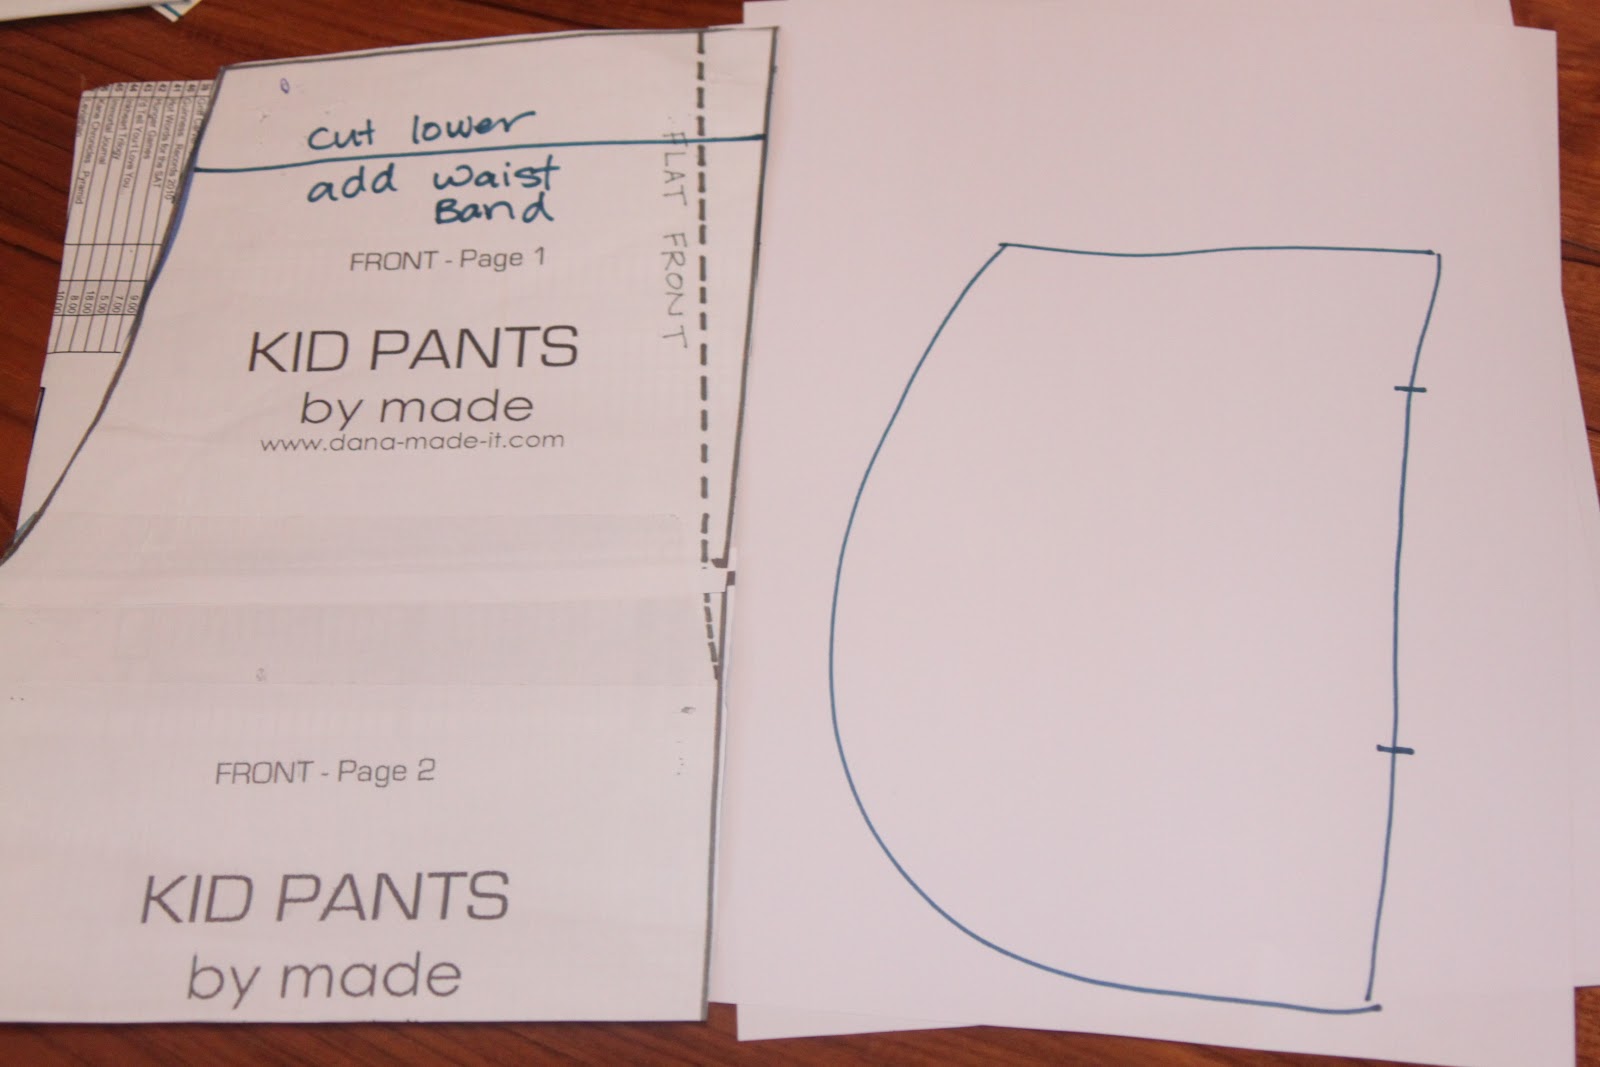
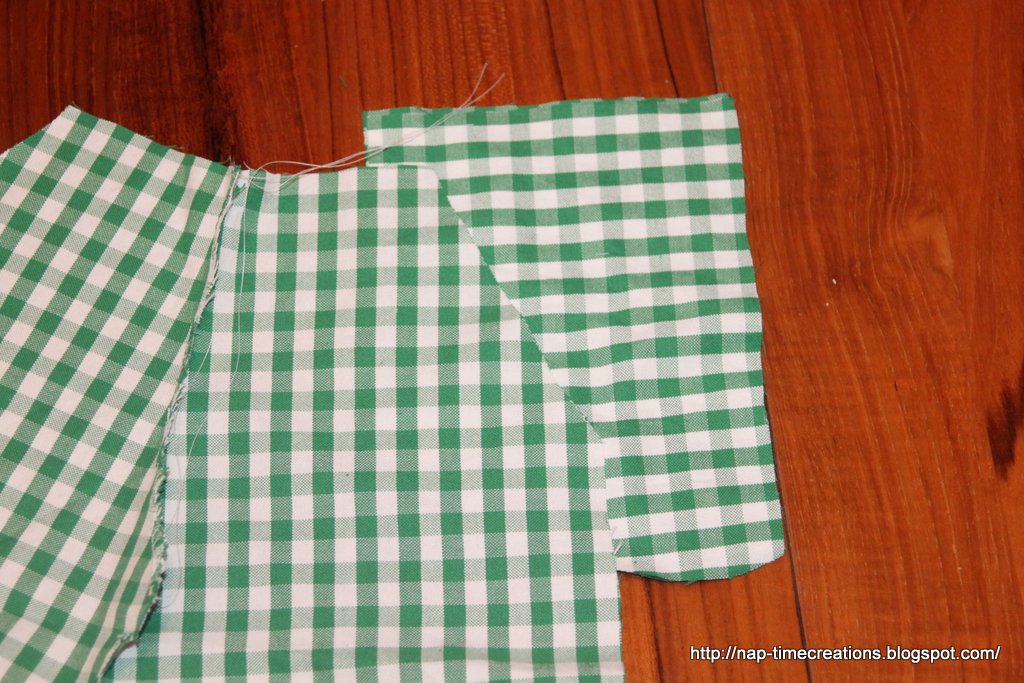
You can see the mark I made on the top of the pattern. You want to take off around an inch from the top. Also, cut the pattern on the line for the flat front. I made my own pocket pattern by tracing the top and side of the pants and making a curve in the middle. You can see above.
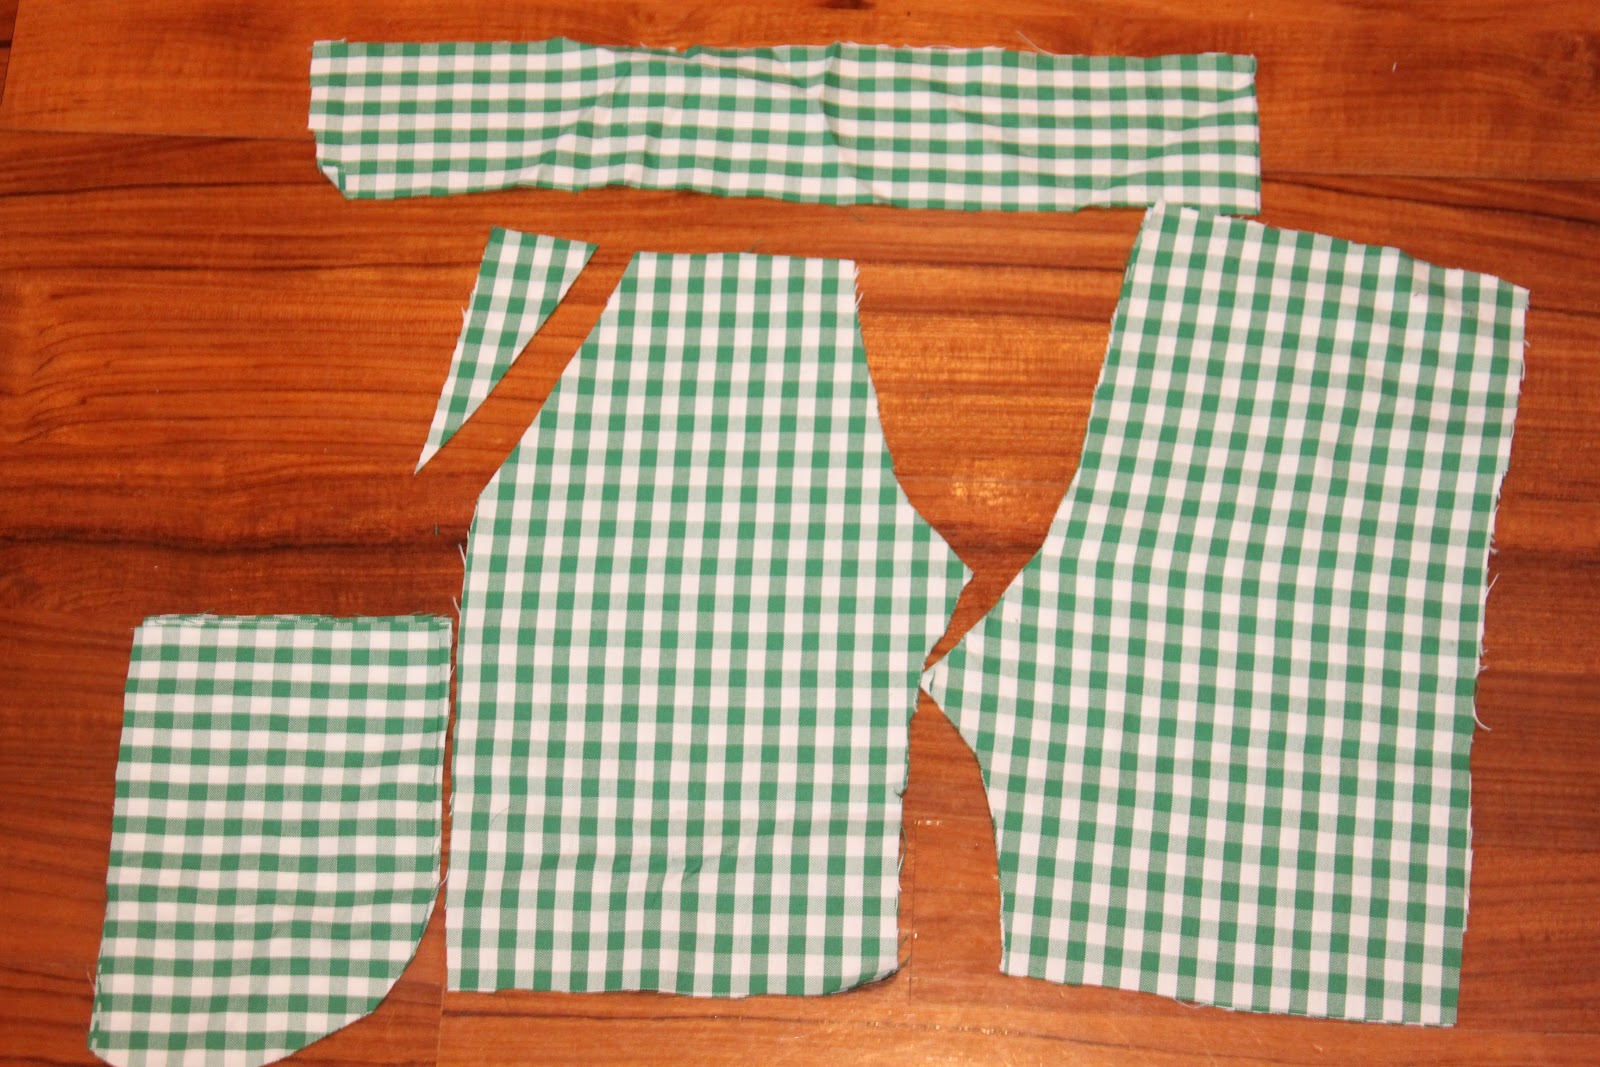
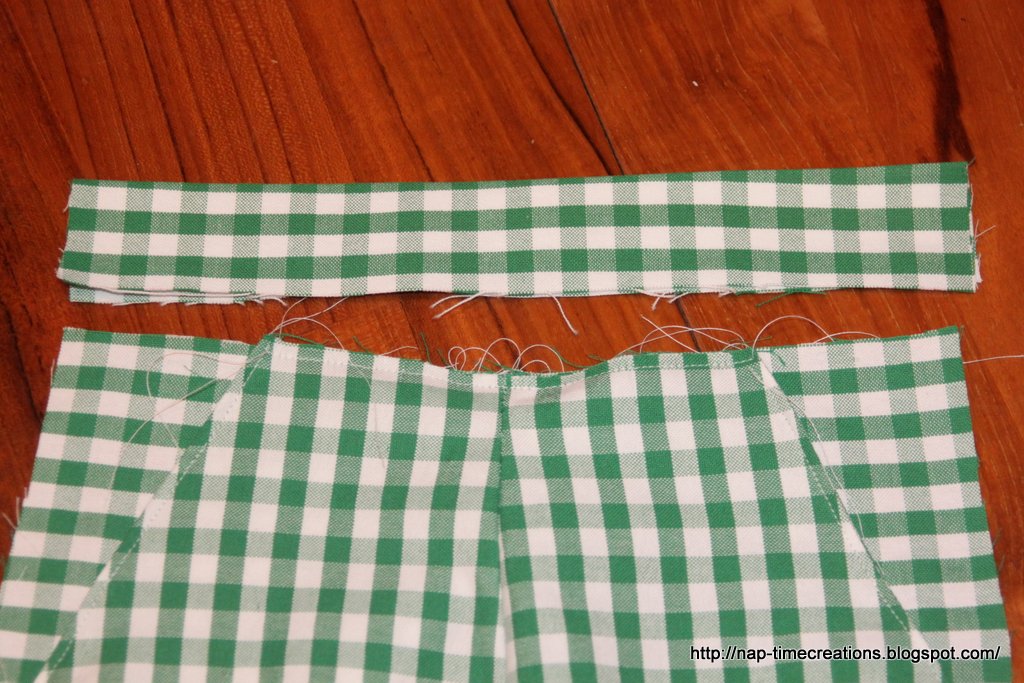
You will also need a waistband 2 and 1/2 inches x by the width of the pants.
Cut 4 pockets
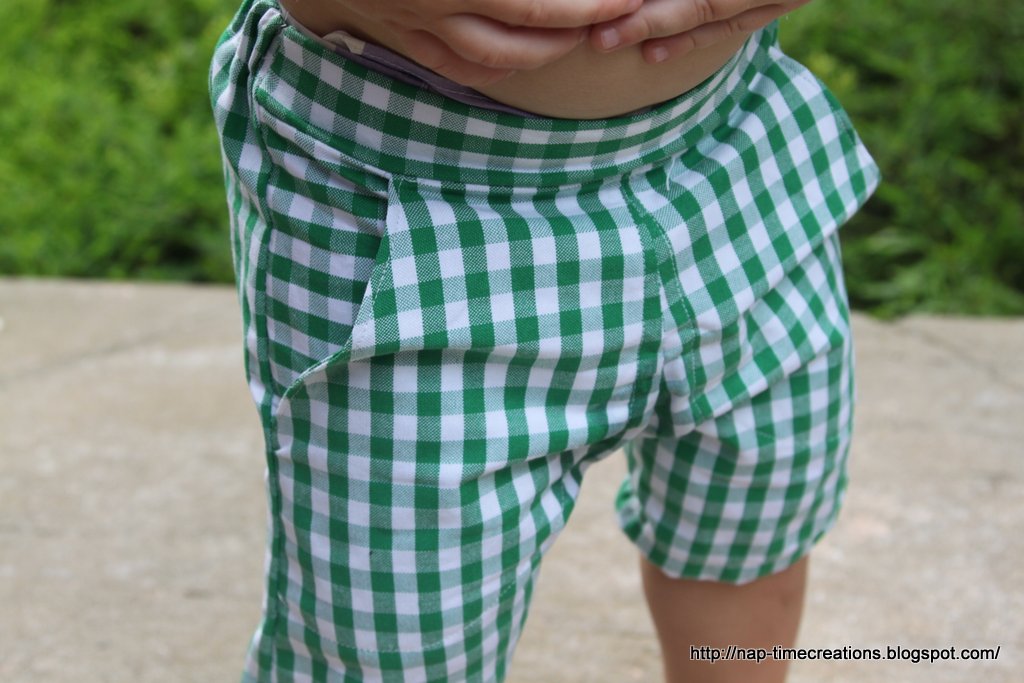
Cut off the corner of the pant front as below..
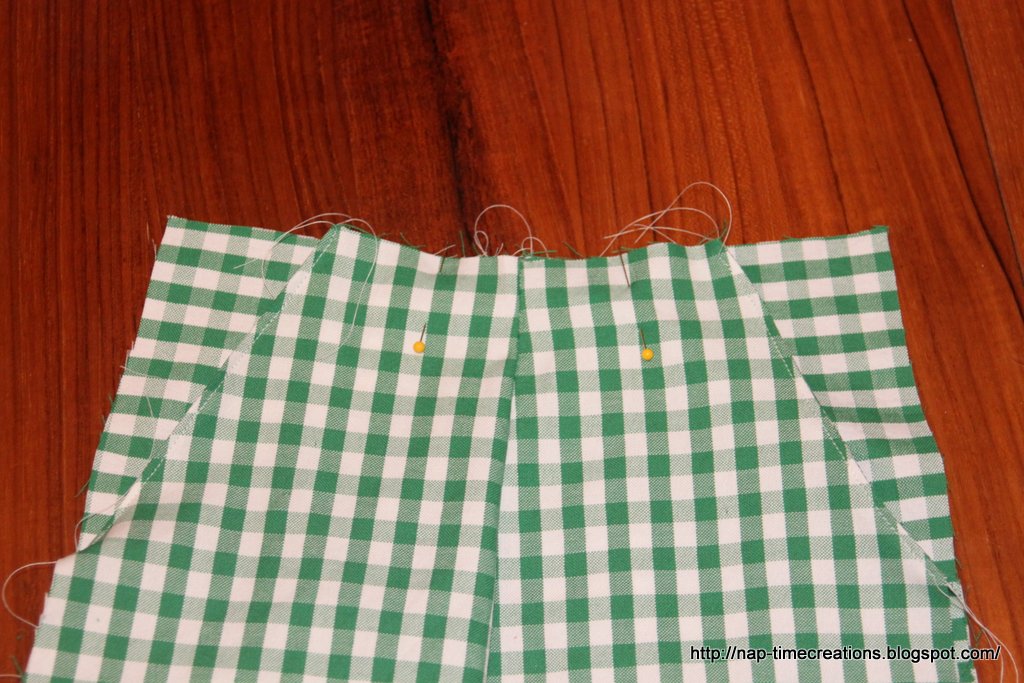
Start by sewing the front pants together at the mid seam.

Cut two of the four pocket pieces to match the edge of the pants.


You will have two of each kind. Make sure you have a left and a right pocket.
Sew around the curve of the pocket.

With the curve seam facing you, pin and sew the angled edge of the pockets together. Check to see that when you fold the pocket over that it is facing the right way.

Top stitch the pocket edge seam. (see my pins below)

I also basted the top of the shorts (see pins)
I did this next step after I had sewed on the waistband, but really it should be done now.
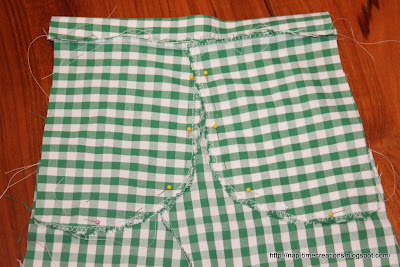
Sew the pockets down. I sewed from the backside along the seam edge.
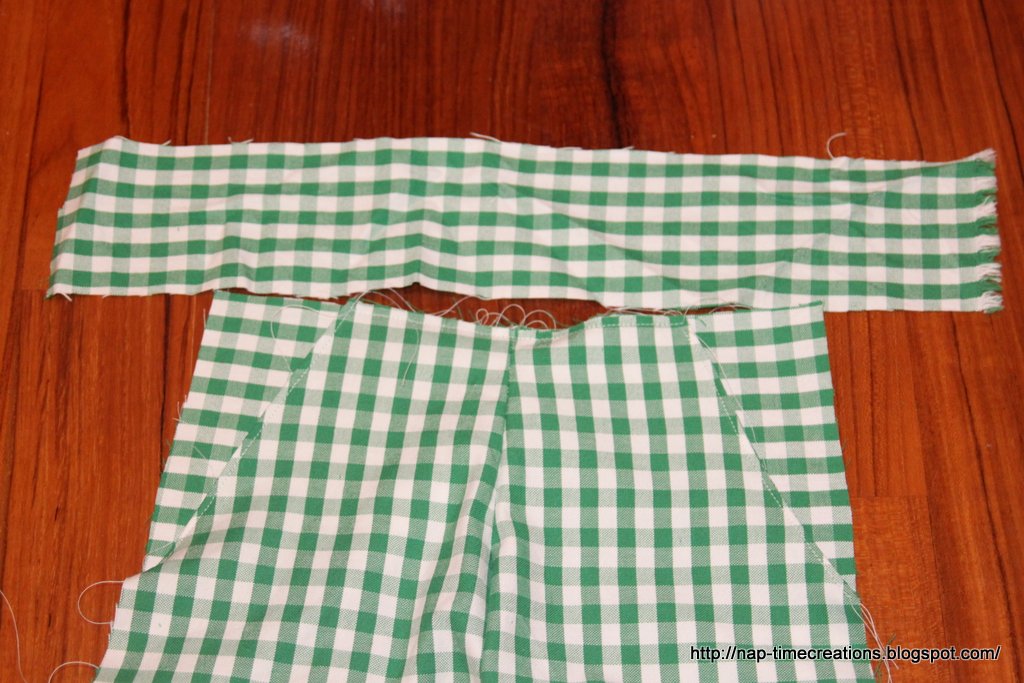
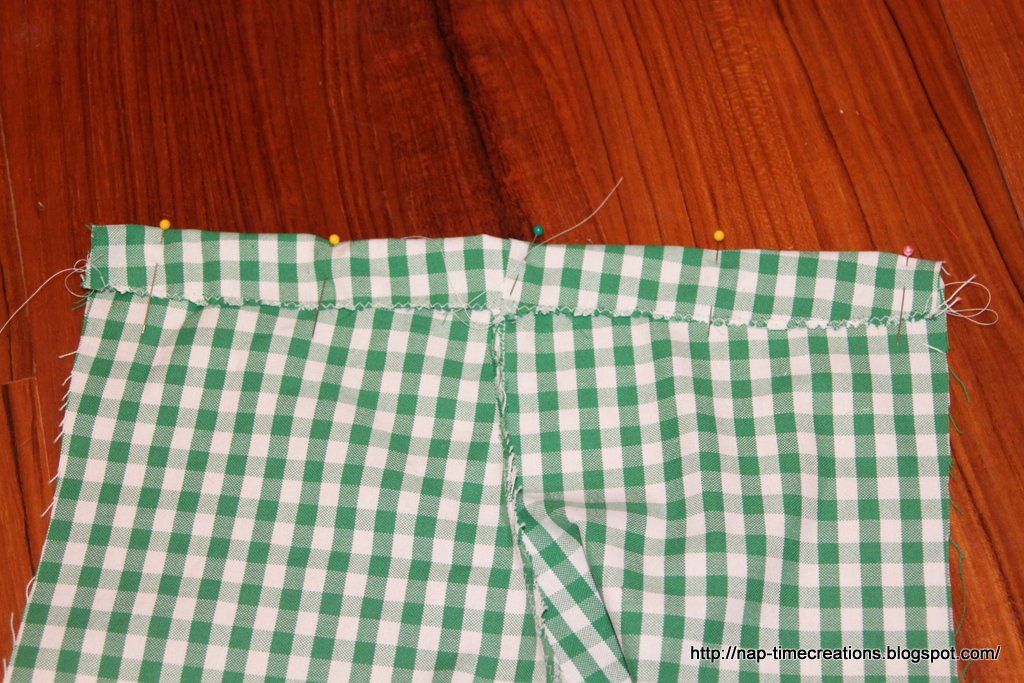
Measure and cut the width of your waistband at this point.
Leaving a 1/3 inch around all side, iron on a piece of stiff interfacing.

Fold over and sew with right sides together to the pant fronts.
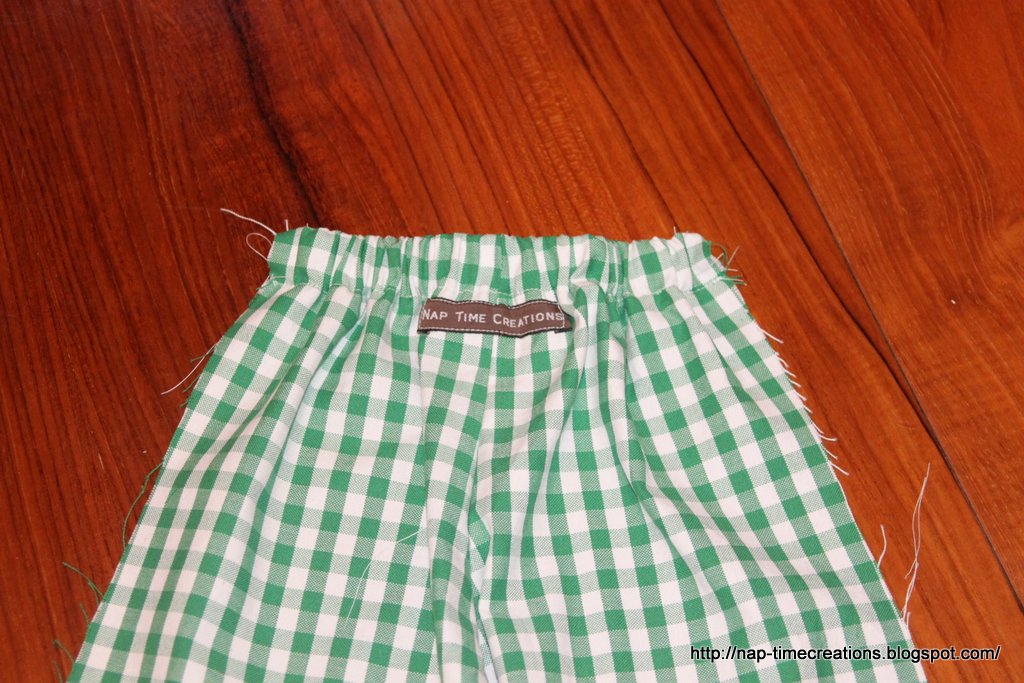
At this point now you will be working on the back. Sew the back together at the mid seam. The make a casing for the back elastic. Measure the kid.. measure the front of the shorts and figure out how much to gather the back of the shorts. I don’t have a serger, so I just zig-sagged, then folded over the casing.
I threaded the elastic and sewed on both side. (oh add a label before you gather if wanted)
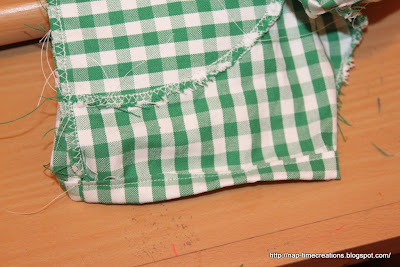
Sew the inseam first with the front and back. Then sew the side seams.

Trim to the desired length and hem. If you have a serger, I would just serge and fold over, but I did a double fold. Then I trimmed up all my threads and I was done!
Please let me know if you have any questions or comments, thanks!

![]()
Enter your email address:
Looking forward to seeing you around the blog…. don’t be a stranger!


austin and kayti says
Oh wow, these are precious! I wish I had the sewing skills (and the time!) to make these for my two year old.
Christine says
Emily… I WANT A PAIR!!!!
Thanks for sharing at The DIY Dreamer… From Dream To Reality!
Jessica says
Awesome shorts! I love how you added pockets to them. They look so cute on your boys. 🙂
justenoughstyle.blogspot.com
Pinspiring Leah says
These are adorable! I’m visiting from the Creations by Kara Look What I Made link party. I have the Kid Pants pattern from dana-made-it Pinned, and I love your alterations! I’m going to pin this and try it for summer shorts for my little guy. I’m your newest follower.
pinspiring.blogspot.com
Jackie says
I have always wanted to do this with Dana’s KID pants pattern but I hadn’t been able to figure it out in my mind. So glad that you did and that I followed you from the Flickr group to your blog. I will definitely have to give this a try. Awesome.
Pascale says
Hi, I really like this one, it lookes simple to make. Do you have a patern?
Emily says
you can check out my sewing for kids in the menu bar and go check out some of the free shorts patterns offered there. You can add pockets to any of them.
virginija visockyte says
thanks I already have ordered fabric but did not have the pattern, i am printing this of and cant wait to get fabric its going to be camouflage, i will probably do same for daddy, both can go to park with matching shorts and t-shirts, they will love it. now have to find something for me and my daughter
Ebony says
No quieostn this is the place to get this info, thanks y’all.
Emily says
Artilces like this make life so much simpler.
http://insurancebystate.dynddns.us/how_to_get_deals_on_car_insurance.xml says
£200 would help to feed so many homeless dogs that solely relie on TARO,it would also help towards any medical care given to the street dogs……
http://lapiluleduweekend.men/ says
It’s great to find someone so on the ball
http://www./ says
That’s a brilliant answer to an interesting question
bedeutung anlage ur says
Keep these articles coming as they’ve opened many new doors for me.
http://www./ says
You’re the one with the brains here. I’m watching for your posts.
lienholder definition says
Great list. One of the best I’ve seen. I like seeing Ideo and Whole Foods on it. It’s impressive to me that Southwest has two aspects to its brand: low cost AND fun.
kreditinstitut unternehmen says
You’ve written about parts that I haven’t been to yet! and It’s my first time to read about that Fagnoon art center! Are you sure you only spent a couple of days in Cairo as a “tourist”? I think I should get the Lonley Planet Egypt edition! hahaSomeday I’ll Be There – Mina recently posted..
hotwire discounts says
My programmer is wanting to encourage me to move to. net through PHP. I have got always disliked the thought as a result of costs. But he has tryiong not one the a lesser amount of. I’ve recently been using WordPress upon several websites approximately a 12 months and are anxious with regards to switching to a new platform. I possess heard advantages of blogengine. net. Is there an easy method I may import almost all my wordpress posts into it? Any form of help could be greatly loved!
Marla says
this was impossible to download the pattern. I don’t need a converter or free forms I just wanted to download the pattern. So I guess I won’t be using your site.
Emily says
here is the direct link to the pattern… http://www.danamadeit.com/2011/02/kid-pants-series-the-basic-pant-tutorial-and-pattern.html
Greet says
I cannot download the pattern anymore… is there any chance that I could still get it somewhere? thank you!